
Download the PDF version of this manual
Relevant support documentation
1. Setup on macOS computer.pdf
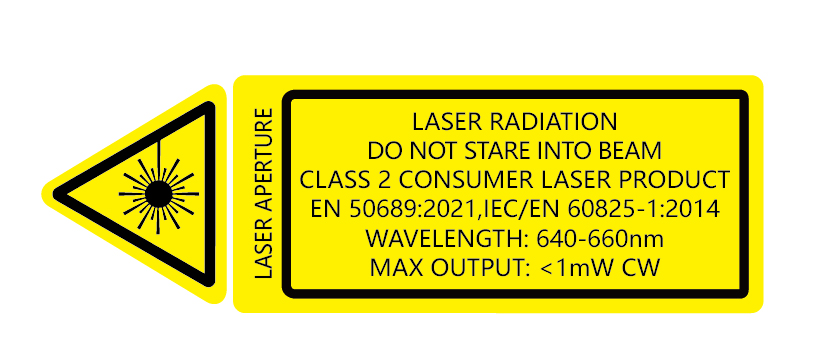
This product generates a laser beam. Do not look directly into the laser beam, and do not point the laser beam at others' eyes to avoid eye injury. Do not give this product to children as a toy!
Safety Precautions
1. Use this product correctly according to this manual.
2. This product is for professional use only. Children under 14 years of age are strictly prohibited from using it.
3. Do not point the laser beam at human eyes, including via mirror reflections.
4. Do not observe the laser beam with naked eyes or using optical instruments (e.g., telescopes or magnifying glasses).
5. Avoid pointing the laser beam arbitrarily at various optical reflective surfaces.
6. Do not intentionally or casually irradiate people.
7. This product contains a built-in lithium battery. If the battery swells, stop using it.
8. Do not place the product in high-temperature environments or throw it into fire.
9. Do not immerse this product in water or any other liquid.
10. Do not disassemble, impact, or crush the product without authorization. If the product malfunctions, contact Norwii after-sales support.
Connection Methods
1. USB Cable.
This unit comes with a USB-C cable with a USB-A adapter. It can be used to connect the receiver to a computer, and also to charge the transmitter. It is recommended to connect the single USB-C plug end to the receiver, and the other end with the USB-A adapter to the computer.

2. Connecting to a Computer.
Connect the receiver's USB-C port to the computer's USB-C or USB-A port using the cable. The receiver has 4 USB-C ports. In use, all 4 USB ports function identically. Any one of them can be used to connect to a computer for control.
The receiver can connect to and control up to 4 devices simultaneously. When multiple devices are connected, all devices will receive the same commands simultaneously, as shown in Figure 2. To connect multiple devices, please purchase additional cables separately.
The USB receiver uses the standard USB HID protocol, which is also used by ordinary keyboards and mice. Windows PCs, macOS computers, and mobile phones generally have built-in drivers for this protocol. The receiver will automatically install the corresponding driver upon insertion. After driver installation is complete, control is possible. When connecting to a mobile phone, if a "USB connection method" window pops up, select "Transfer files",do not select "Transfer photos" or "Charge only".

3. Relationship Between Transmitter and Receiver Channels A and B.
The transmitter needs to be paired with the receiver's A or B channel to control the receiver. Pair a transmitter with the receiver's A channel, and that transmitter will be displayed as A. Pair another transmitter with the receiver's B channel, and that transmitter will be displayed as B, as shown in Figures 3 and 4 in the Pairing section.
4. Pairing.
1) Pairing with Channel A:
Long press the receiver key , the indicator light for key A will start flashing, indicating that Channel A has entered pairing standby mode. Channel A will remain in pairing standby for 30 seconds after flashing begins. Keep the transmitter and receiver within 20 cm of each other. Turn off the transmitter's power switch and then turn it back on. At this point, the receiver's Channel A key light should stop flashing and become solid, indicating that the transmitter has been successfully paired via Channel A, and the transmitter's display will show the symbol “
 ”.
”.
Using the same pairing method, up to 6 transmitters can be paired with one receiver's A channel. When pairing one transmitter, turn off the power switches of other transmitters.
If the transmitter's power switch is not turned off and on again within 30 seconds, the receiver will exit pairing mode, and the receiver's Channel A key light will stop flashing. To pair again, repeat the above pairing steps.

2) Pairing with Channel B: Using the same pairing method, pair another transmitter with the receiver's B channel. Up to 6 transmitters can be paired with one receiver's B channel. Upon successful pairing, the transmitter's display will show the symbol “ ”.
”.

3) Pairing with both Channel A and Channel B simultaneously: Long press the A key on the receiver to put Channel A into pairing mode. Then long press the B key on the receiver to put Channel B into pairing mode as well. At this point, turn off the transmitter and then turn it back on. The transmitter's display will show both  and
and  , indicating that the transmitter has been paired with both Channel A and Channel B. Now, turning on either Channel A or B allows the transmitter to control the receiver.
4) One transmitter can be paired with the A channels of N receivers. This design allows one transmitter to control multiple computers simultaneously.
This transmitter must be continuously paired with the A channels of N receivers and cannot switch to the B channel. If it switches to pairing with the B channel, the transmitter becomes B.
Using the same pairing method, another transmitter pairs with the B channels of N receivers.
1 transmitter can control N receivers, and each receiver can control 4 computers, meaning 1 receiver can control 4N computers.

5) If not paired, all function keys on the transmitter except the physical laser key are invalid, and the transmitter's display will show the symbol “  ”
”
5. Clearing Pairing
Pairing can be cleared via the Norwii Presenter software, or by long pressing the key  on the receiver. After clearing pairing, no transmitter can control the receiver. Only by re-pairing with the transmitter can control be restored.
After the receiver's pairing is cleared, the transmitter's screen may still display A or B, but the transmitter can no longer control the receiver. Press any key on the transmitter to contact the receiver; the receiver will notify the transmitter that it has been cleared, and the transmitter will then display the symbol “  ”.
”.
Transmitter Functions Diagram

1. Bakc : Click to page up. Long press has no function to prevent misoperation. Users can customize the long press function in the Norwii Presenter software as needed.
2. Next : Click to page down. Long press has no function to prevent misoperation. Users can customize the long press function in the Norwii Presenter software as needed.
3. Laser key : Press and hold to activate the laser beam; release to turn it off. Because LED and LCD screens themselves are not reflective, the laser spot is almost invisible on LED/LCD screens. This is not a quality issue.
4. Volume keys: Short press "+" to increase volume, short press "-" to decrease volume. Long press for continuous increase or decrease.
5. Customizable functions: The Norwii Presenter software allows customization of the Page Up and Page Down key functions. Follow the on-screen instructions.
6. LCD display: Shows time, A/B channel, countdown reminder, key press indication, signal strength, battery level, and charging status.
1) Display time: The product has a built-in timing module and displays time on the screen. If the time shown on the transmitter differs from the actual time, open the Norwii Presenter software, click [Settings - Reminder Settings], enable the "Sync presentation remote time with computer" key, then turn the transmitter's power switch off and on again within the next 100 seconds. The transmitter screen will then synchronize to the current computer time.

2) Countdown reminder:
To use the time reminder, download, install, and open the Norwii Presenter software. On the software's [Settings] page, select "Reminder Settings" in the sidebar. Choose a predefined time option or set a custom time for the countdown reminder according to your needs. The countdown will automatically start only when PowerPoint enters full-screen playback mode.

After setting the countdown time in the Norwii Presenter software, press any key on the transmitter within 100 seconds to set the countdown reminder on the transmitter. The transmitter's display will show the alarm symbol "  " as a reminder.

Another method is to set the countdown directly on the transmitter without using the Norwii Presenter software. First, turn off the transmitter's power switch. Then, press and hold the laser key while turning the power switch back on. The transmitter enters countdown mode, and the display shows the last set countdown time, which will start flashing. The default factory countdown is 0 minutes. In the initial state of countdown mode, each single click of the Page Up key increases the countdown time by 1 minute from the default; each single click of the Page Down key decreases it by 1 minute. Long pressing the Page Up key
continuously increases the countdown time in increments of 5 minutes; similarly, long pressing the Page Down key continuously decreases it in increments of 5 minutes.


Starting the countdown: After setting the time, wait for the transmitter display to flash for 5 seconds; the countdown will then start automatically. The transmitter will vibrate to remind you 10 minutes, 5 minutes, and 0 minutes before the countdown ends.
Turning off the transmitter's power switch during the countdown does not affect the countdown progress. If the transmitter is turned on again within the set countdown duration, the countdown will still be in progress. If the countdown duration has already passed when turning the transmitter back on, the countdown will have been completed, and the transmitter will return to the normal clock display mode instead of showing the countdown status.
3) A/B Channel: The display shows the symbol " " indicating the transmitter is paired with the receiver's A channel. The display shows the symbol " " indicating the transmitter is paired with the receiver's B channel. The display shows both symbols " " and " " indicating the transmitter is paired with both A and B channels. When the display shows the symbol " ", it means the transmitter is not paired with the receiver.


4) Key press indication: A finger symbol flashes synchronously above the display to indicate a key press.

5) Signal strength: Five bars represent the strongest signal. Each bar decrease indicates weakening signal, allowing you to assess the signal strength and usage distance in the current environment.

6) Battery status:
To obtain accurate remaining battery capacity, we use a fuel gauge as found in mobile phones. General consumer electronics often reduce costs by estimating capacity through battery voltage measurement. Since voltage is easily affected by output current, estimating capacity via voltage is very inaccurate. Norwii N60 uses a fuel gauge adopted from mobile phones. Although it costs more, it provides users with accurate battery information.
The number displayed in the battery icon at the upper right of the display indicates the current remaining battery percentage. When charging, the transmitter display shows a lightning symbol "⚡", and the battery icon displays the numeric charge level in real time. When fully charged, the number inside the battery icon will be 100, indicating 100% charge.


7) Sleep mode for power saving: Each time a key is pressed, the display lights up for 5 seconds. If no key is pressed after that, the display automatically turns off to save energy. Pressing any key again will light up the display.

1. Mode key :
:
1) Single click , to cycle between Mode 1 to Mode 4.
Mode 1 indicator solid: Page Up/Down keys function as Up/Down Arrow keys.
Mode 2 indicator solid: Page Up/Down keys function as Left/Right Arrow keys.
Mode 3 indicator solid: Page Up/Down keys function as Page Up and Page Down keys.
Mode 4 indicator solid: Page Up/Down keys function as Mouse Wheel scrolling.
Long press , clears pairing for A/B channels. All transmitters stored on the receiver will be cleared and can no longer control it.
2. Back  : Single click to page up.
3. Next  : Single click to page down.
4. Channel A control key: Short press to turn Channel A on or off; long press to start Channel A pairing.
5. Channel B control key : Short press to turn Channel B on or off; long press to start Channel B pairing.
6. USB ports: One receiver has a total of 4 USB-C ports: USB1, USB2, USB3, USB4. Connect the receiver to computers via data cables. Supports connecting up to 4 devices simultaneously for multi-screen control.
7. Updating receiver firmware: The receiver has 4 USB-C ports, each controlled by a separate chip. When updating firmware, each USB-C port must be updated individually.
System Requirements
Compatible with Windows 10 and later, macOS 12 and later, Android 16 and later, HarmonyOS 3.0.0 and later, iOS 18.6.2 and later, and Linux 5.4.18-142-generic and later.
Product Parameters
Transmitter
1. Transmission frequency: 433MHz
2. Operation range: 800m (2,625 ft) ¹
3. Laser power: see warning label on the product
4. Laser distance: 200 meters
5. Green light wavelength: 495-545nm
6. Battery capacity: 600mAh lithium battery
7. Operating voltage: 3.6-4.2V
8. Charging voltage: 5V
9. Charging current: 0.3A (max)
10. Product dimensions: 41.9*90*14.1mm
11. Product weight: 55g
Receiver
1. Operating voltage: 4.5-5.5V
2. Product dimensions: 47*90*16.6mm
3. Product weight: 59.6g
Package Contents
Transmitter*1, receiver*1, storage case*1, charging cable*1, manual*1
Note
¹ Max range (open area):Up to 800m (2,625 ft)
Test conditions:Outdoor, no obstacles, no interference
Actual range may be affected by:Walls, battery level, interference
For best performance, maintain a clear line of sight.